Showing posts with label scrapbooking. Show all posts

Thursday, January 29, 2015

Cricut Design Space Tutorial: SHAPED Card using Weld and Score and Doll Image from "Paisley" cart.

Hello lovely readers!

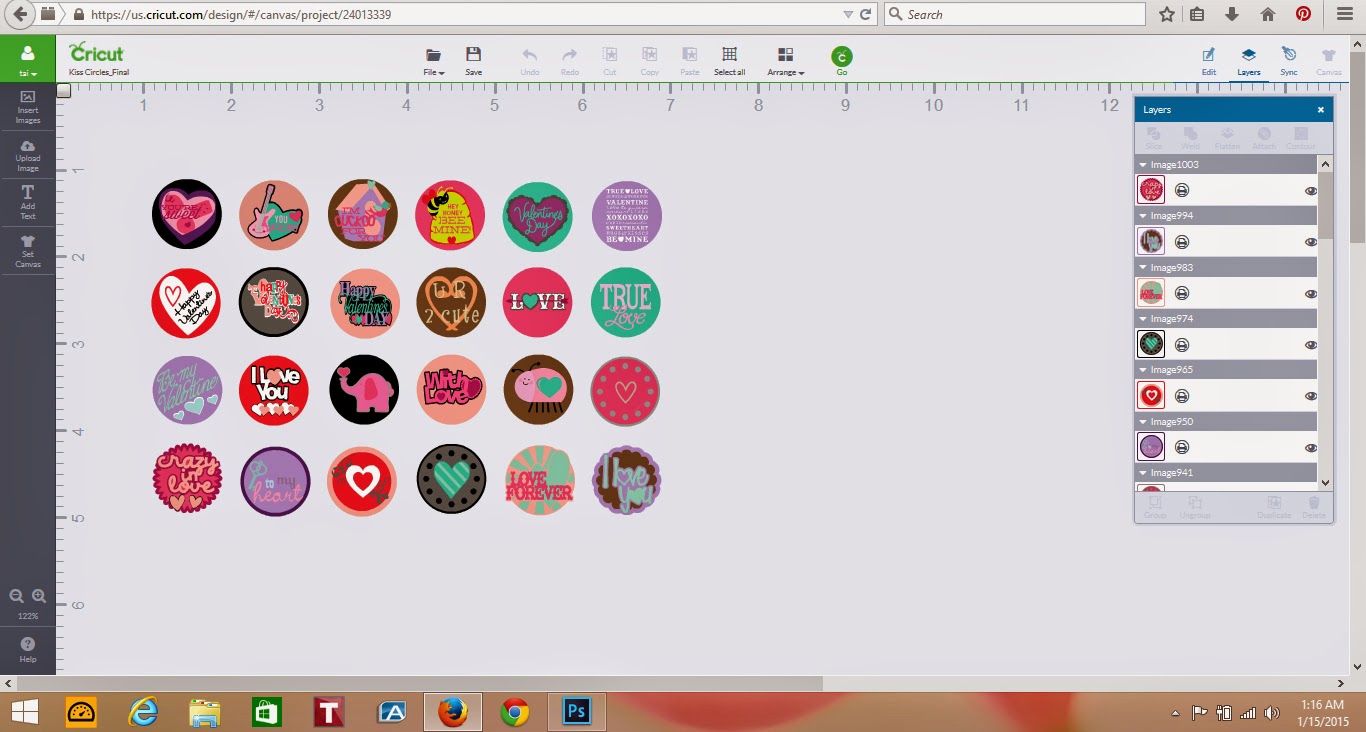
I've been on vacation from work this week so I've been spending a good bit of my time with my children and getting things done around the house that have lay uncomplete for so long. However, I have found a bit of time (mostly late at night after the kids are asleep) to play with my Cricut Explore and Design Space.  I spent way too much time (until about 3 a.m.) last night creating Hershey Kiss circles (0.75" circles) in a Valentine's theme to Print 'N Cut with my Explore. I found that it was lengthy and the more circles I added, the more Design Space lagged.  I created 25- 3/4" circles on one canvas and will not do that again. It took between 30-45 seconds for each button I pushed after I had about 8 circles designed. However, all is not lost! They turned out super SWEET! I'm currently working on that tutorial and hope to have it up in the next day or two. In the photo below, you can find a PREVIEW of the file or click the link below the photo if you just want to go ahead and use my design. I'll forewarn you, you would almost have to have the subscription (or own a slew of cartridges) to be able to use the design. If you own a majority, simply hide the images you don't own before pressing GO!


Finally let's get on to the task at hand...

Paisley Doll Shaped Card DS Tutorial


I found this project to be fairly simple if you have a good understanding of Design Space.  I'd say it'd also be fairly simple to create shaped cards using just about any image with a shadow layer by following these steps:

1. Open Design Space, Sign in, and create a new project. If you prefer to work with a canvas, you could do so at this point. I usually just design on blank space when creating cards and such.

2. Click Insert Image, search for your image and be sure it has a shadow layer (I used a doll from the Paisley Cartridge #M3A1DD), when you've found one you'd like to use, insert it to your canvas.

3. You will then need to ungroup and hide all layers except your shadow layer. Duplicate the shadow layer and move the duplicated layer to the left of the image, just joining the layer slightly below it. When you have the images joined slightly, select both images (drag the box over both layers) and choose WELD from your layer panel.

4. Go to Insert Image again and search for line (a score line should be the first choice).  Insert the score line and center it between each side of the card. It is very important that this is lined up correctly, otherwise your fold will be off centered. Line up your score line and then select both layers again (the card base and score line) and select ATTACH from your layers panel.

5. Un-hide all the other layers and be sure they line up.  Collect your paper choices and select GO! when you're ready to cut.  Cut each layer on the papers of your choice and assemble as shown on your work area.

6. When assembled, fold your card on the score line, add the doll to the base and collect your glue pen, tweezers, and rhinestones.  Place one glue dot at a time and adhere your rhinestones using alternating colors as shown in the photo.  Continue to place your rhinestones until all six are glued down.  Let dry for a half hour or so before adding to your envelope choice.


Sunday, January 4, 2015

Thrifty Tutorial: HOW TO Re-Tack your Cutting Mat


So, you're working on a project and your die-cut keeps coming out partially cut or tatterned and torn and you're getting frustrated. You don't have a spare mat or at least not one that is any more tacky than the one you're already working with. You don't have $13.00 lying around burning a hole in your pocket to invest in new mats that will cut for only a few weeks anyways. I have the solution. Take your previously invested in cutting mat, a few materials you have lying around the house, a few cheap materials that you will invest in once (and spend less money than to purchase new mats) and will last for many, many re-tacks and re-tack your mat yourself. It's simple! I'll share with you how to do so, just keep on reading.

What you will need:


  • a hard surface, either outside, in a well-ventilated area or near a window
  • a sink with a stopper that your mat will fit into while fully submersed or at the very least, large enough that it can be flipped over to submerse
  • an old rag or two and an old towel
  • newspaper, wrapping paper, or rolled craft paper
  • Dawn dish detergent (at least 1 teaspoon)
  • a clipboard, hung on a nail on the wall above a towel (or you could lay it directly on a towel and flip to dry each side if you are unable to hang a clipboard)
  • 2” wide masking tape (or 1” wide doubled up)
  • rubbing alcohol or nail polish remover
  • a spray bottle (optional)
  • metal or plastic scrapper
  • re-positional, light tack spray adhesive (I use Loctite General Performance 100 light that I got at Jo-Anns for $4.49 after using a 40% off coupon)
    Loctite Spray @ Jo-Anns
  • plastic protective covering or clear transparency film (to protect your mat between uses and keep debris off your newly tacked mat)

What you will do:


  1. Protect your hard surface using your newspaper or craft paper (or other material that you don't mind if it gets thrown away)
  2. Pour your rubbing alcohol/ nail polish remover into a spray bottle and generously spray your mat. (If you don't have a spray bottle, you can just pour a small puddle into the middle of your mat and use an old rag to spread around the gummy portion of your mat.) Let sit for 7-10 minutes.
  3. After alcohol has sat on your mat for the allotted time, take your scrapper and starting at the top corner or bottom corner, scrape firmly (but not hard enough to scrape off protective coating) and remove old tack gum in 2-3 inch sections moving from one side to the other, top to bottom. After completing all the removal steps, all gum will need to be completely removed before adding more adhesive to retack so pay close attention and remove as much gum as possible during this step. Scrape several times until you have removed as much gum as possible.
  4. Run very hot water with about 1-2 teaspoons of dish detergent in a sink allowing enough water to submerse your mat. Add your mat to the sink and let soak in the hot water for 5-10 minutes.
  5. Remove to old, clean towel laid on your hard work surface. Again, use your scraper to remove any left over gummy residue. Pay careful attention to the edges and corners as this is where the majority of the residue ended up on my mat as I was cleaning. When you are fairly certain that all residue has been removed, return to hot water and use an old rag to scrub remaining residue. It is VERY important that all residue is removed before re-tacking. Be sure to scrub well the back of your mat as little gummy balls may have ended up there as well and will stick to your machine and possibly ruin your rollers.
  6. Remove from water and drain sink Shake mat well and remove as much water as possible.
  7. Hang on clipboard above a towel and let drip dry until COMPLETELY dry. If you are impatient like me, or in a hurry, you can use a hair dryer on it's lowest setting and dry your mat. Be sure to keep your dryer 8-12 inches away as to not melt the plastic mat you just spent 45 minutes cleaning. Be sure mat is COMPLETELY dry before moving onto the next step. This is very IMPORTANT!!
  8. On your protected hard surface, that is well ventilated, tape off your mat using masking tape. Be sure to line the tape up with the outside line just below or inside each margin. You do NOT want spray adhesive on your margins so take your time and tape carefully. Use the corners of the tape to tape it down to the surface. This will hold the mat in place while you are spraying. When you've finished taping, the only part of your mat that should be visible to you is the space with the grid.


  9. When you have taped your mat off and down to your surface, shake your spray adhesive can and spray your mat in linear motion from left to right, overlapping each line before. Be sure to hold your can 8-10 inches from your mat to insure that you don't glob up your glue. If you hold it 8-10 inches away and move in linear motion, you will spray fairly evenly. Let adhesive dry COMPLETELY and repeat 2-3 more times. For higher tack mat (like you can spend yet more money on) just spray a few more times. I do 5-7 coats for an extreme tack mat. 3-4 coats for a standard tack. Be sure to let each coat dry COMPLETELY before adding another. Let dry completely before removing tape, conditioning and first use.


    Watch this 6 second video to see the spraying motion I did!

  10. You're almost done!! Condition your mat as you would if you purchased it new. I use my hands and press them down over and over to un-tack the mat a bit before using the first time. If you aren't going to use it right away and/or before putting your mat away, use protective plastic to cover your mat to keep debris from aiding in a lesser tacky mat.
  11. Use your mat!!

Welcome to Rock Paper Die-Cuts!

Welcome to Rock, Paper, Die-cuts! This is my blog where I share projects to inspire, tutorials to teach, and secrets I have learned about die-cutting machines and materials.  I hope to inspire each of you to let your creativity shine! Everyone has the ability to be creative.  Die-cutting can be so much more than paper and glue!  Look around and enjoy!!

01/04/2015

This is my very first day with a blog!! Check out my first Frugal Post! How to RE-TACK your cutting mat!!!